
Attending my first meeting of the Cardiff University of the Third Age (U3A) Computer Group, I offered to write some notes to accompany the talk that was given on Data Storage in the Cloud by David Reeves. So here goes …
Computing has moved a long way from the days when all you stored on your computer were words and numbers. Gradually this has been extended to include first pictures, then audio, and then video. With the addition of these media so the requirements for memory to store them increased first by needing an increase in the Random Access Memory (RAM) that the computer had so that you could actually view or listen to the media, and then in the disk storage you needed to hold and recall the images or music at a later date.
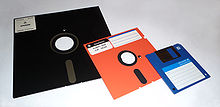
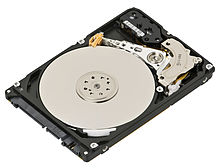 This need for additional storage meant first the introduction of floppy disks, then hard disks inside the computer, then external hard disks
 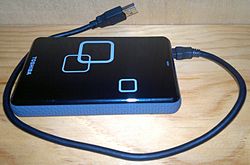 connected usually to a USB port on your computer and then flash drives which you could carry around
  with you and then connect to a USB port on your computer.
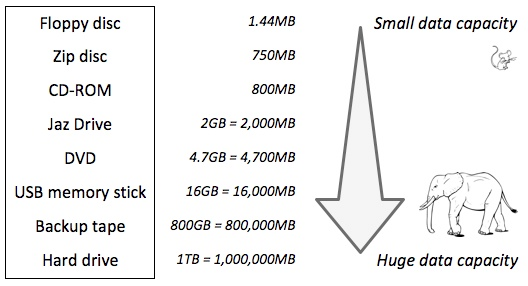
With the changes in technology, so the amounts of information stored by each device increased. To give you an idea of how much this has changed you might like to look at the table below – which is actually out of date because you can now get both USB Memory Sticks and Hard Drives considerable larger than those quoted here.
If you want to read more about Information Storage including some technologies I’ve not discussed here such as CD/DVDs you could follow this link or this one, but there’s far more information in these articles than you need to understand why it might be a good idea to store information away from your computer – in the cloud.
Before we do that it might be a good idea to raise an issue that storing all this data causes – what happens if the device breaks, gets corrupted in some way, or just simply gets lost! Now, computer professionals have always done back-ups of their stored data (or they should have done), but the home computer user has never really put a value on their data UNTIL they lose it. So backing-up your data (stored information – words, numbers, images, music and videos) is actually an ESSENTIAL part of owning a computer. This article describes the various ways you might consider backing-up your data but at the bottom of the list is Cloud Storage and that’s where I’m going to take you now.
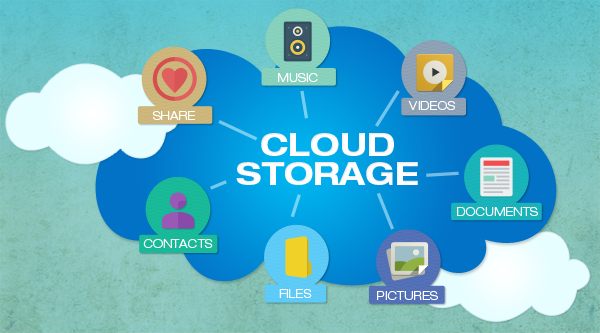
Wouldn’t it be great if every time you saved a picture, word processed document, spreadsheet … whatever, a copy was automatically made and stored away from your computer so whatever might happen to your computer, the most important part of it – the information it stored – was safe. That’s the essential value of Cloud Storage and the most important reason for using it. We’ll turn to the second most important reason – sharing information with others – later.
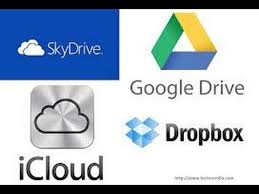 There are a number of Cloud Storage options you can use for free as long as you keep your storage below a certain limit. You can use as many as you want to and you might consider using different providers for different purposes. For instance I use Google Drive mainly for Photo Storage, Apple’s iCloud for documents, and Dropbox for sharing stuff. [I’ll maybe explain why I do this in another post.] The other main provider is Microsoft with their OneDrive (formerly SkyDrive) offering, I don’t tend to use this much, but the principles for using it are much the same as the others.
So how do you use them? As I said above, the principles for each are much the same. I will use Google as the main example, and provide links to the others as well.
Google Drive. You will need a Google Account. This is a good idea in any case as it allows you to create another eMail account – I’m a strong advocate for having more than one eMail address anyway (see Point 3 in this post). Go to Google Accounts to setup your Google ID – you can use your existing eMail address if you want to. Then with your account set up you can go to this page. I would suggest you download the applications for your desktop as well as setting it up for your browser. Installing the application on your Windows PC, or your Apple Mac, will then create a Folder in which you can store information and which then will then be backed-up to your Google Drive “in the cloud”. Voila – you have peace of mind that your precious information has been saved. Any changes you make to the information will be synchronised with the version saved on your cloud storage.
For Dropbox go to this link and create your account, perhaps using the Google email address you’ve just created above – a lot of services allow you to link to your Google ID and this means you don’t have to remember lots of IDs and Passwords.
If you’re an Apple user (iMac, MacBook, iPhone, iPad, etc) it makes sense to use iCloud. Even if you’re not, you can still add an iCloud Drive to your desktop and access the 5Gb of free storage you’re provided with “in the cloud”.
If you’re a Microsoft (Windows and Office) user it makes sense to use OneDrive. Like iCloud you get 5Gb of free storage from this link. You may also find that you are offered the option of installing OneDrive when you install Microsoft Office (or Office 365).
Finally sharing information with others. I don’t think I can improve on David’s demonstration and on this YouTube video …
I’ve focussed on using a Folder on your desktop/laptop machine to backup or synchronise files to your Cloud Storage. Remember also that David demonstrated how you can Upload a file using your web browser (I would recommend using Google Chrome) from your desktop to your Cloud Storage.
